Portrait Mode is not just for people photos. You can create stunning photos of plants and nature by switching over to Portrait Mode in your iPhone camera.
Portrait Mode is the iPhone’s way of creating extra digital blur so that your subject pops out nice and sharp against a blurry background. It gives you a beautiful softness that feels like a pro camera took it.
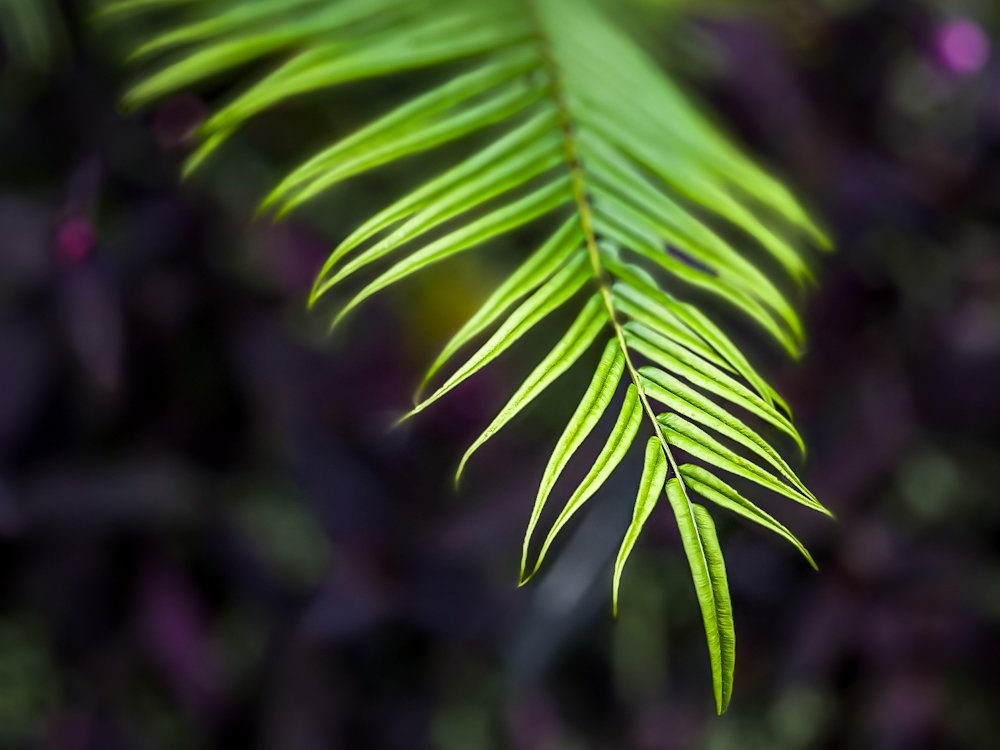
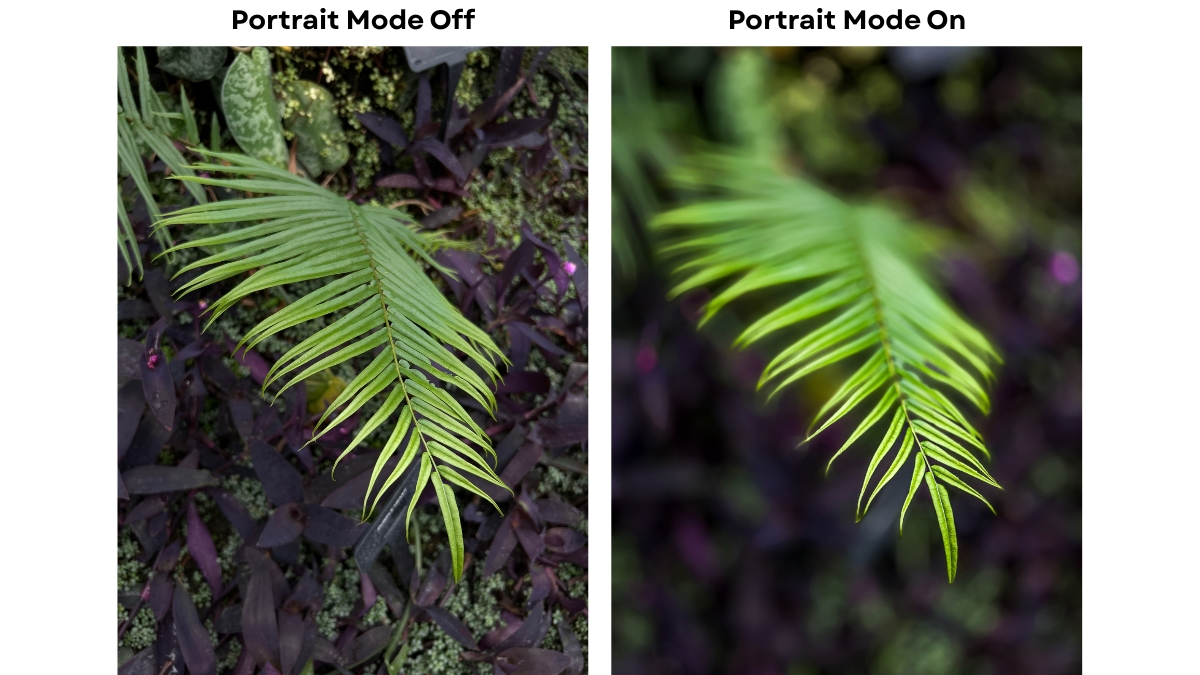
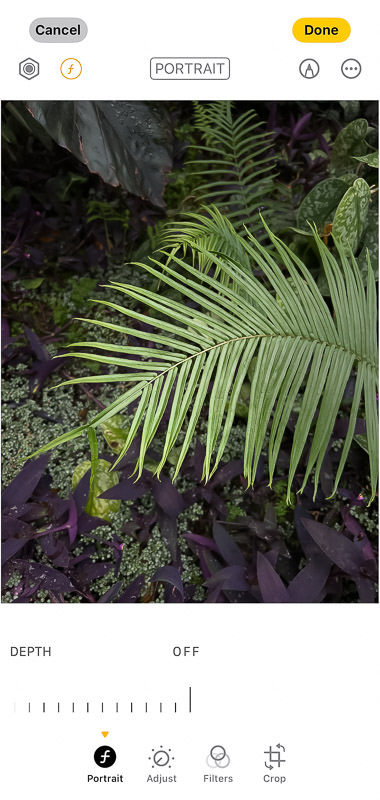
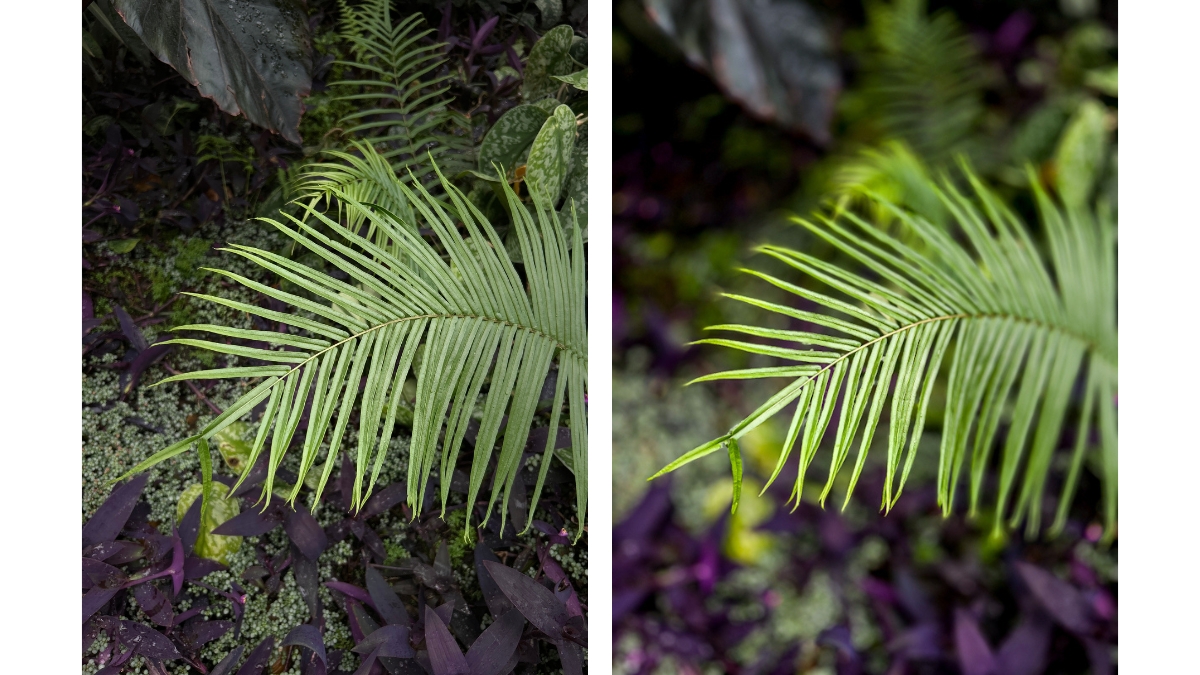
Look at the difference between a regular iPhone photo of this fern leaf, and the same photo switched over to Portrait mode at f/1.4:
Ready to start making your nature photos pop? Read on.
Elevate your plant photography with your iPhone
Next time you’re in nature or at an indoor botanical garden like I was, swipe to Portrait mode in your iPhone camera app:
Portrait Mode works best when shooting a subject (in my case, a large fern leaf) with enough space between it and the background.
Here’s how to do it:
First, get yourself a good angle and make sure to have a lot of space (depth) between your plant and the background.
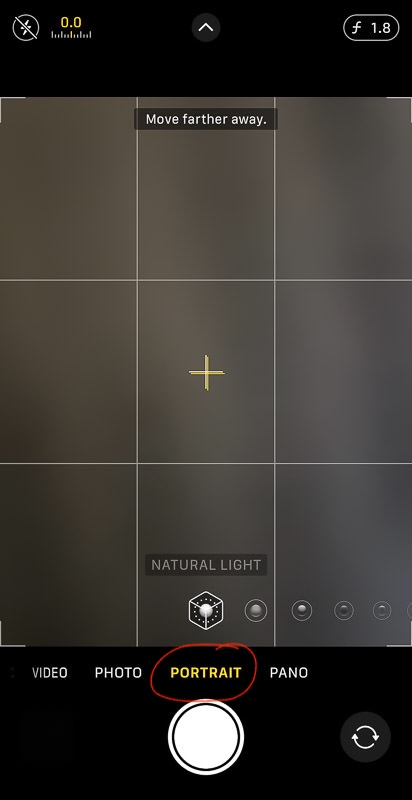
Next, using my iPhone camera app, I switched to Portrait mode. Tap on the plant to make it in focus. Watch the background go blurry.
If your camera is too close to the subject, the camera will tell you “move farther away”. It can’t focus if you’re too close, so make sure to move the camera away from the subject in order to focus.
Once you’re happy with the composition and focusing point, click the shutter to take the photo.
But wait, there’s more!
Once the photo is taken, you can further edit the focusing details.
(This is the fun part!)
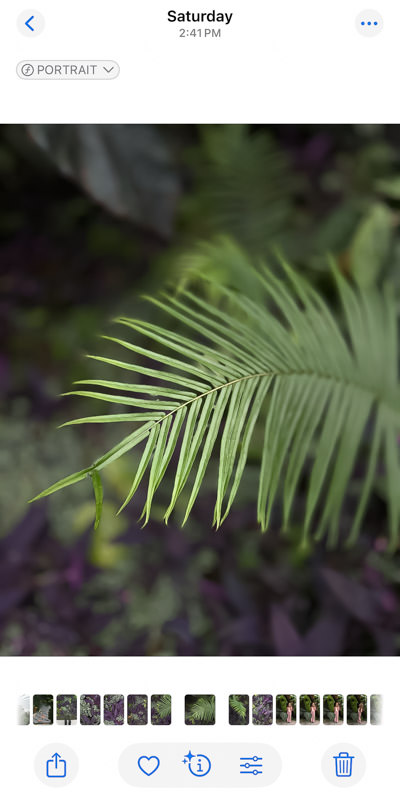
Go to your Photos app and tap on the photo you just took. You’ll see this:
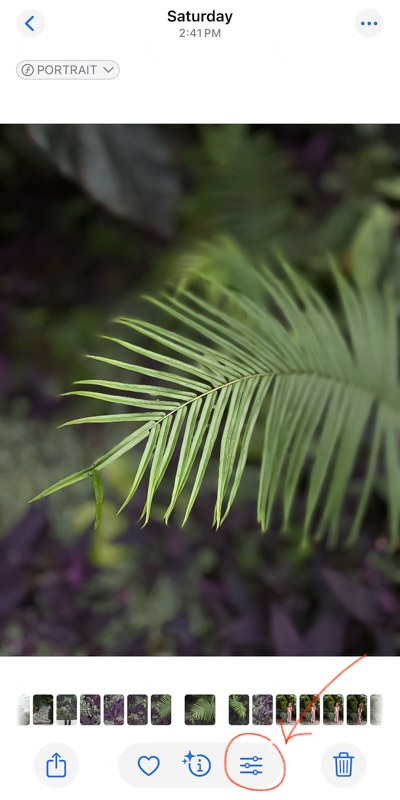
Click on the editing icon at the bottom of the image ⬆️.
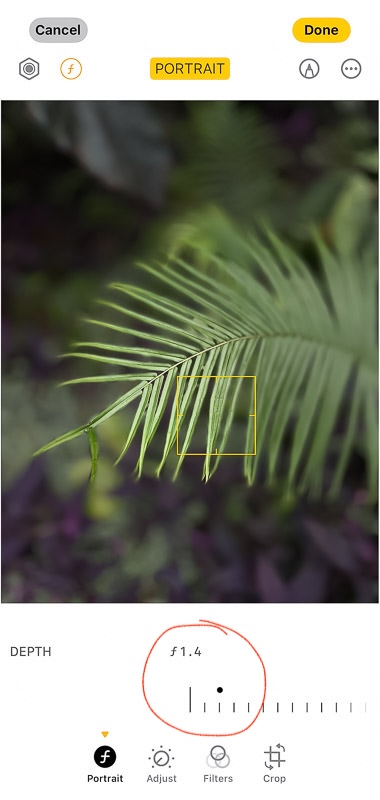
You’re now in Portrait editing mode (it will say PORTRAIT at the top of your image). At the bottom of your image you will have a depth of field (f) slider that you can move:
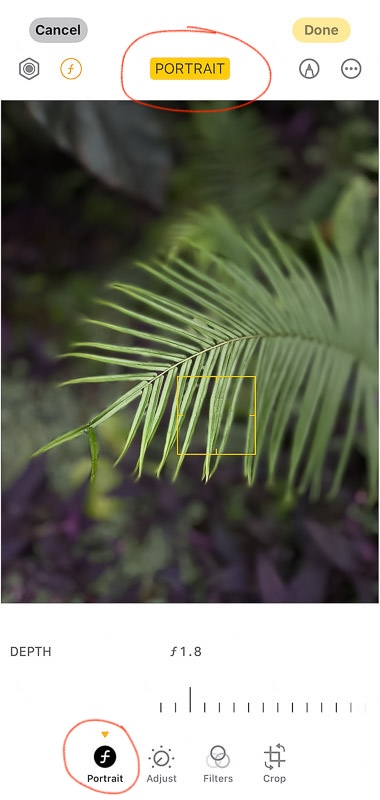
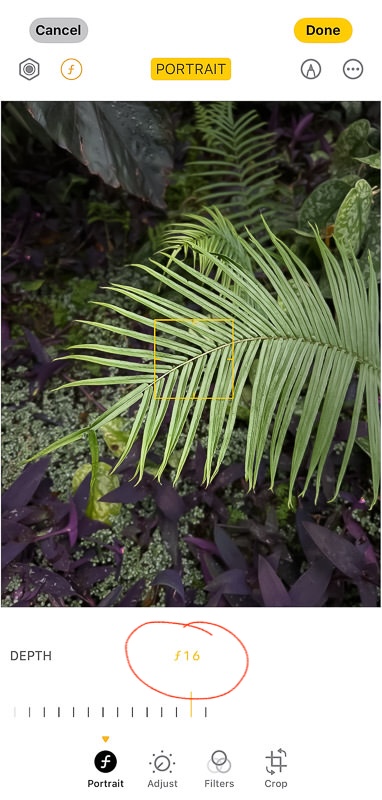
f/1.4 on the one end of the slider will be your blurriest depth of field. On the other end of the slider just one notch before the very end, your depth of field will be f/16. One more notch to the right and then the Portrait mode is OFF. At f/16, almost everything in the image is in focus. There is very little depth of field.
With it OFF, nothing will be blurry in the image.
The default camera on the iPhone generally takes photos with everything in focus. That’s why going to Portrait mode and increasing depth of field (making the background really blurry) is such a nice feature. It elevates the quality of your image, giving it a nice blurry effect to it, something that is not typically seen with point and shoot phone cameras.
I like going to f/1.4, as it gives maximum blurriness to my photo.
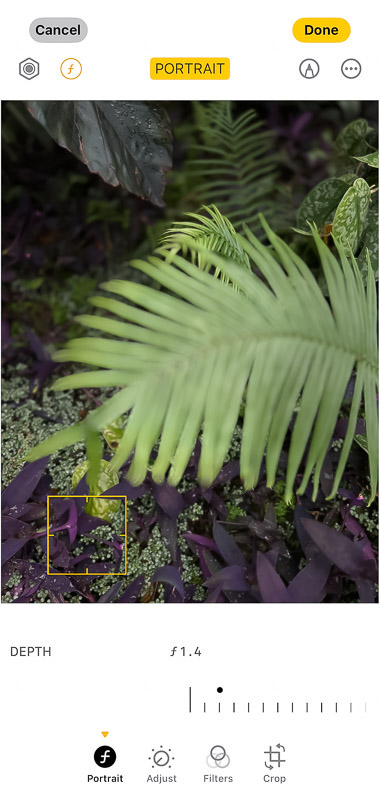
Now that you controlled how blurry the photo is, you can also change the point of focus.
The yellow square will show you where your focus point was when you took the photo.
But if you click elsewhere on the image even after you’ve taken the photo, the focus point will change.
For example, I clicked on the ground and the point of focus is now there. You’ll notice the fern is out of focus, and the ground is tack sharp:
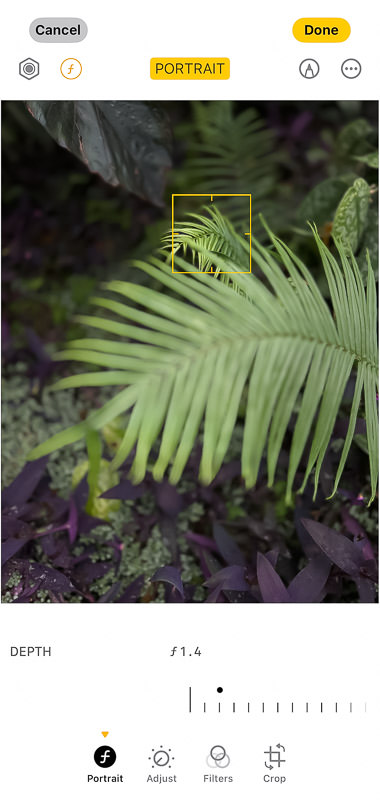
I also clicked on the other fern in the background for a different look. When that is the point of focus, now the ground is blurry, as well as the fern that is at the top of the image:
You can play around with your point of focus and amount of blurriness until you’re happy with your final results.
Once you’re done, click on the “done” button to save your settings. Don’t worry, the changes are never permanent. You can always go back and change the focus details later.
Once I’m happy with my focus results, I then send my photo to Lightroom Mobile to have it edited.
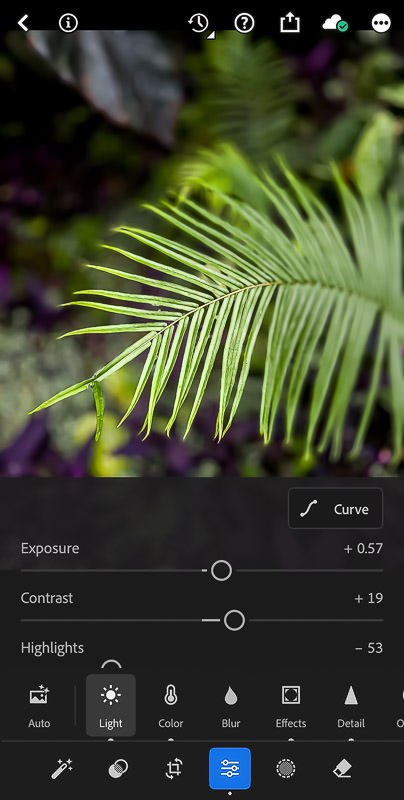
I have a preset that helps make my plant photos pop. It includes an increase in exposure, an increase in contrast, an increase in saturation, a few boosts of texture and sharpening. (Learn how to create a custom editing preset in Lightroom Mobile here.)
And here are the results!
I went from having a boring iPhone photo (on the left) to an elevated iPhone photo on the right.
Hopefully this helps you next time you’re out taking photos of plants and nature. Remember to use Portrait Mode and edit the photos in Lightroom Mobile. It’s a great trick for getting your iPhone photos looking more professional.
Ready to take your photography to the next level? Join my 1-hour phone photography crash course for beginners here: