What do these photos have in common?
For one, a lot of them aren’t sharp or in focus.
Some are fuzzy. Some have motion blur.
Others don’t even have a clear subject.
The bottom line: these aren’t correctly captured.
But that was the point.
In order to push your creative boundaries, you must be comfortable with making intentional mistakes.
Force your camera to shoot out of focus. Take photos through blurry glass or use distorted reflective surfaces.
The point is to break the rules and discover art on the other side.
How these photos were taken:
Curious how you can take “incorrect” photos (AKA “artsy” photos) with your iPhone camera? Here’s how I took these photos.
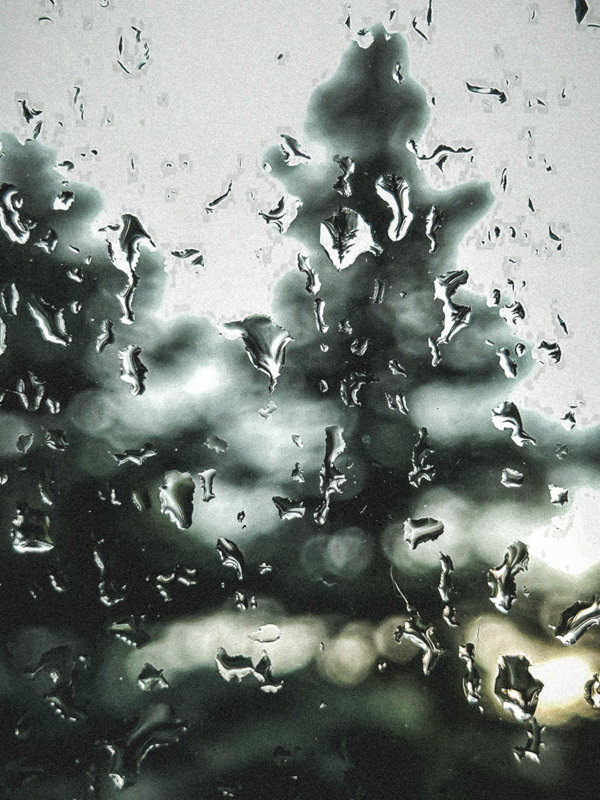
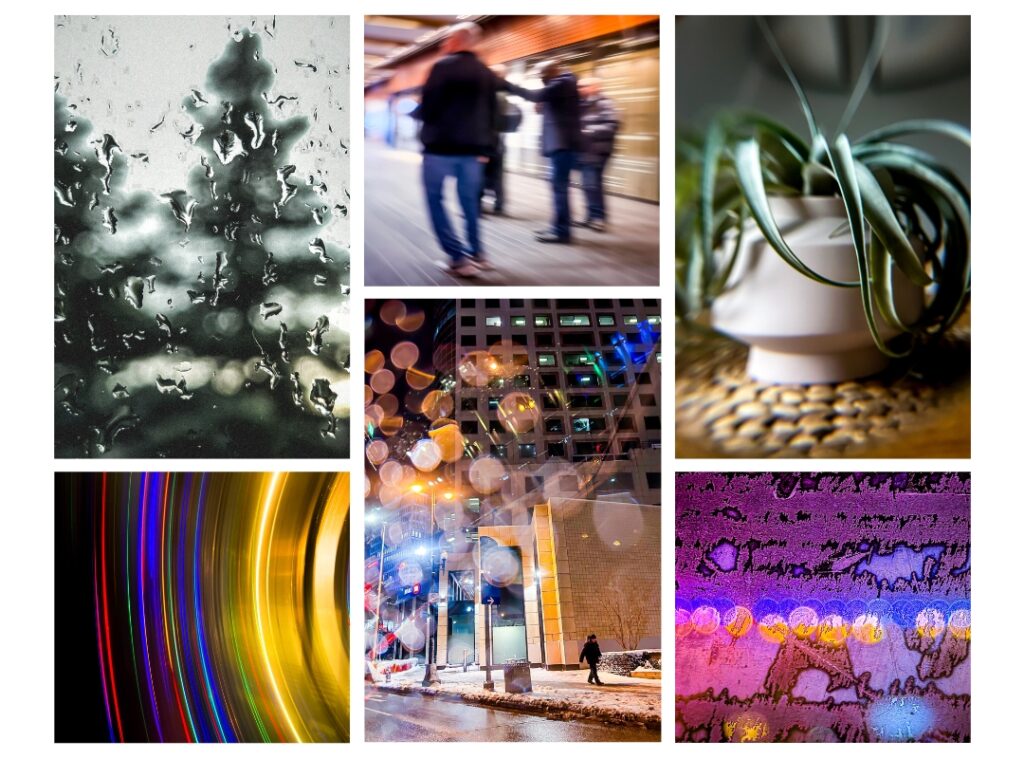
⬆ This photo was taken from inside a house, shooting through a raindrop-stained window. I brought my camera close to the window and made sure to focus my iPhone camera on the raindrops, and not on the tree outside.
Without forcing the camera to focus on the raindrops, it will automatically focus on the highest contrast object in its view. Since the dark tree outside is visually contrasted against a bright sky, the iPhone camera will likely grab focus there. The rain drops are fairly lower contrast and not as stark, so the iPhone won’t auto-focus there.
How to override the autofocus on your iPhone camera:
- Move your phone closer to the window so the raindrops fill more of the frame.
- Tap on a raindrop on the screen to set the focus point.
- Press and hold until “AE/AF Lock” appears to lock focus on the raindrops. This way, if you move your phone slightly, the camera won’t try to refocus on the background.
- If the raindrops aren’t quite in focus, adjust your distance to the raindrops back and forth a bit until the drops appear sharp.
- Take the photo.
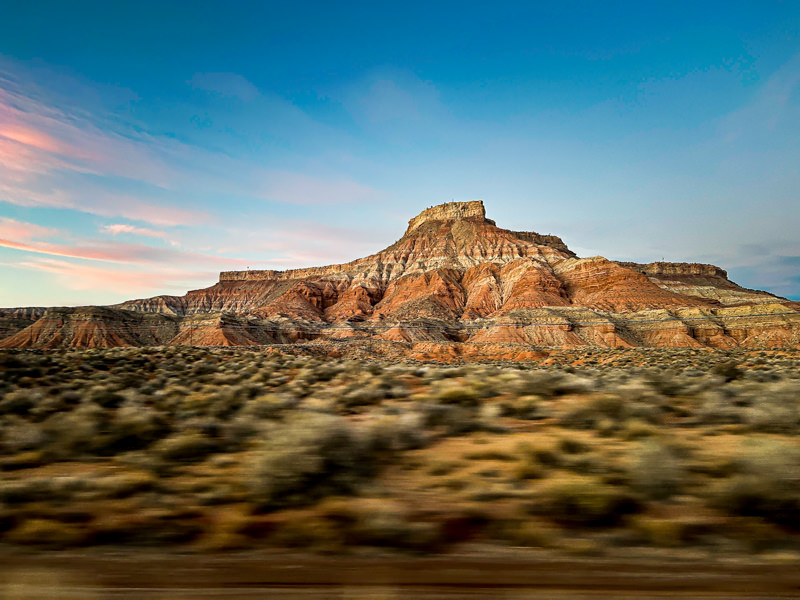
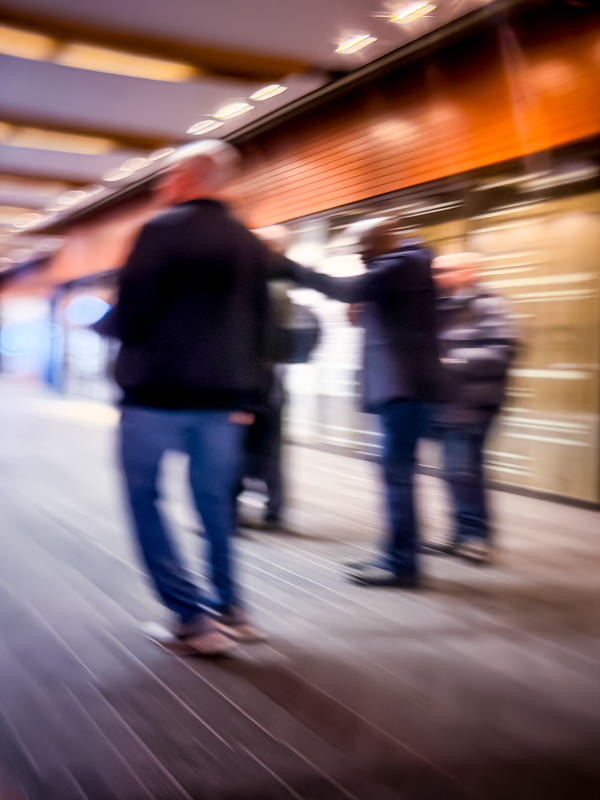
⬆ This photo was taken through the passenger window of a car I was riding in down a Utah highway. Originally, I just wanted to capture the mountain in the distance, but after I took the photo, I realized that it captured beautiful movement blur near the bottom of the image.
How to get motion blur:
- Make sure you subject is moving fast compared to your camera (in my case, my camera was moving fast).
- Keep your phone stable so that the objects in the distance remain as sharp as possible.
- Wait until dusk (or low light) as this will increase the movement blur effect.
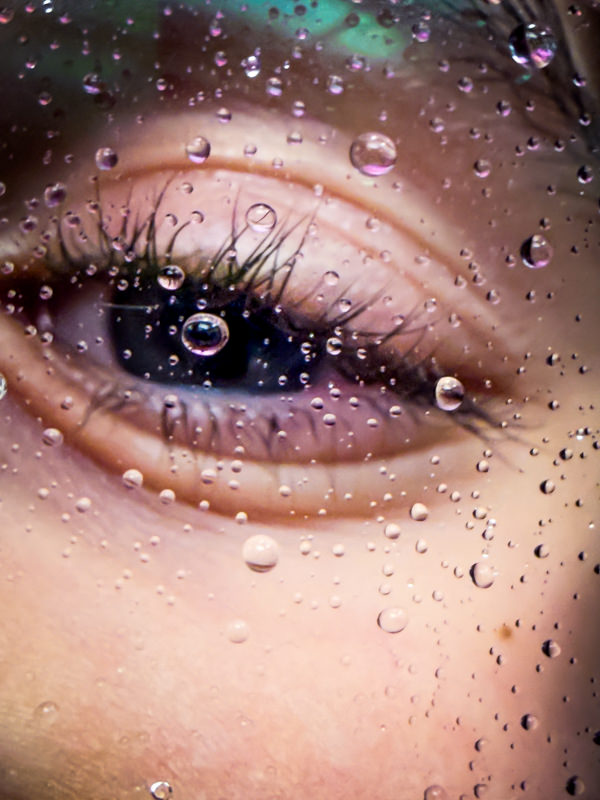
⬆ This photo is similar to the technique used in the first photo described above (with the raindrops on the window). Instead, in this photo these are raindrops on eye glasses after walking under the indoor waterfall at The Leaf in Winnipeg.
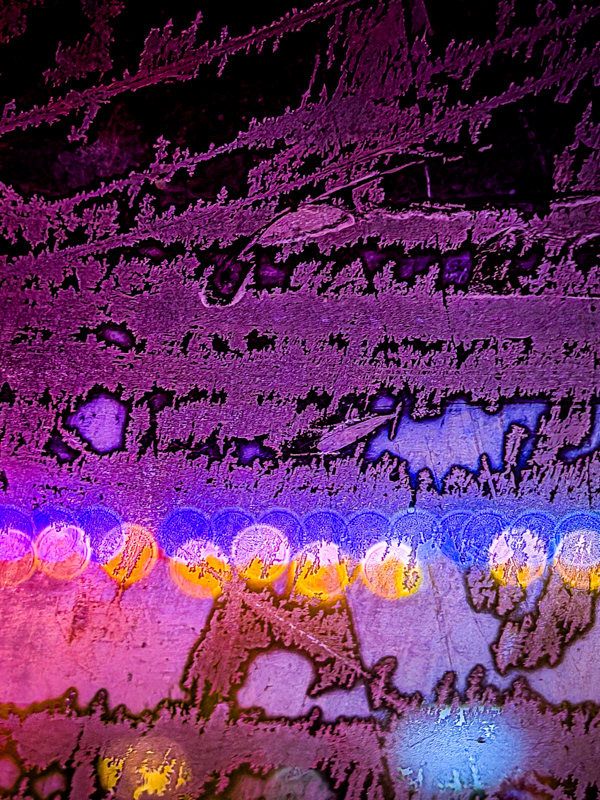
⬆ This photo was taken while shooting through a frosty car window in the middle of the winter.
Behind the window were stringed, colourful lights. By forcing my iPhone camera to focus on the frost rather than on the lights outside the window, this created bokeh.
What is Bokeh?
It’s a common photography term. It’s the circular, out-of-focus blur where points of light appear as soft glowing circles.
To get this effect, tap on the screen where high contrast lines in the frost appear. This forces the camera to focus on the frost, rather than on the lights in the background.
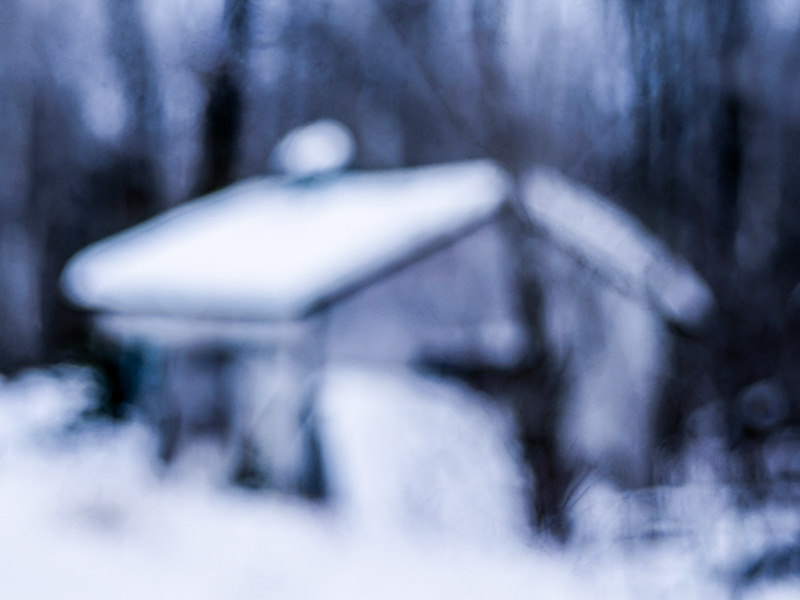
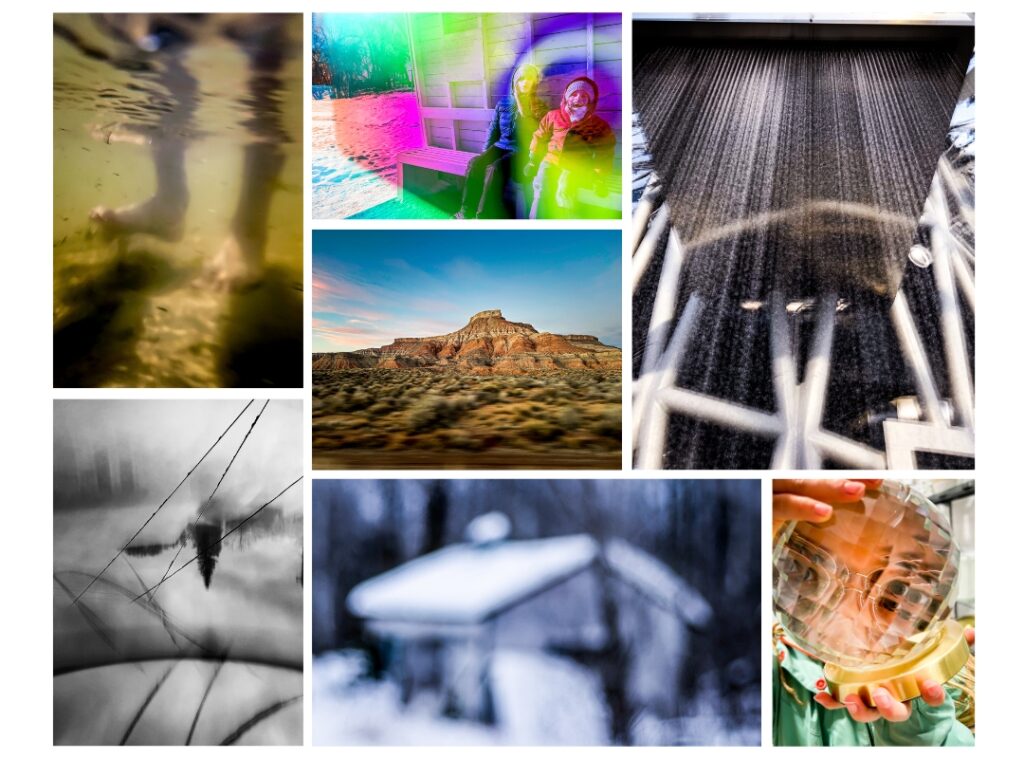
⬆ This photo was taken while I was walking down an old farm road with outbuildings in the woods. I was starting to get bored of the scenery, so I decided to get a bit artsy and force my iPhone to shoot out of focus.
How to set your camera out of focus to take a series of blurry photos:
- position your camera close to any subject
- turn off macro mode (click on the yellow flower icon until a white line crosses it.)
- tap on the screen to focus on the subject closest to the camera
- hold until “AE/AF Lock” appears. This will lock the focus at a close distance.
- point your camera to a subject in the distance to take a series of blurry photos.
You can continue to take blurry photos this way until you either tap on the screen to unlock focus, or until you turn off your camera.
⬆ I bought a pack of biconvex lenses on Amazon and I use them to take creative photos. I simply hold them in front of my camera lens and shoot through them. This creates fun distortion that has endless possibilities. I originally bought them for my Nikon mirrorless camera and lenses, but found that they work great with my iPhone camera too.
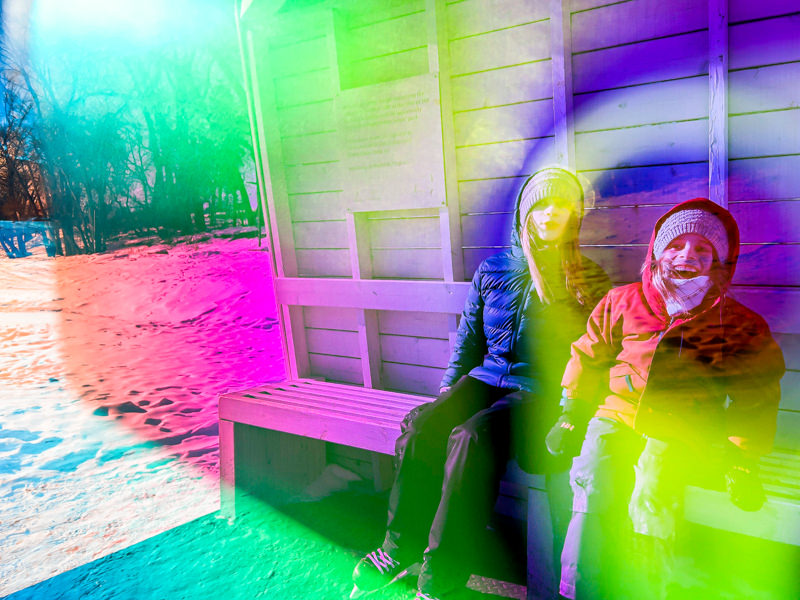
⬆ This photo was taken as I shot through a specialized mirror glass. It was half see-through and half mirror reflective, with colour. I have no idea where you can acquire such fun material! I simply came across it at a public art installation in Winnipeg.
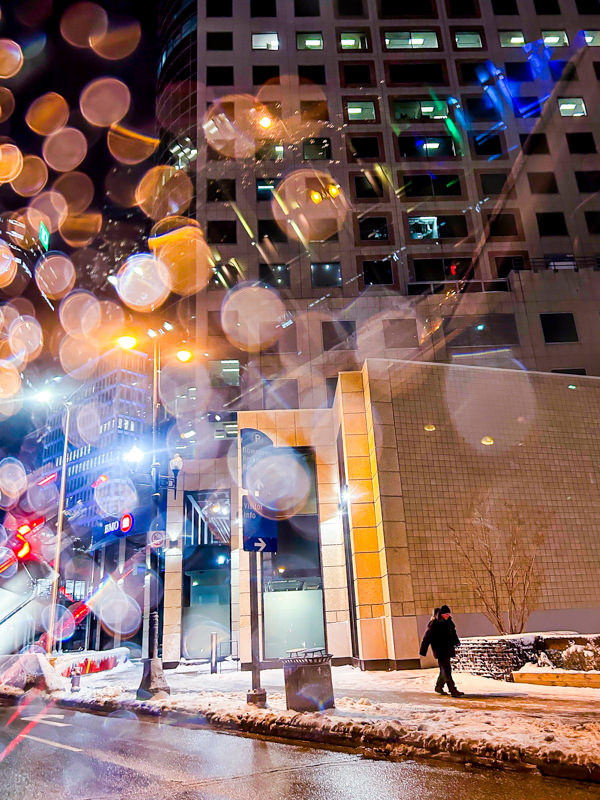
⬆ This photo was taken through the passenger window of a car that had melting snow on it. The snow had turned into drops, and it created bokeh as I focused on the person in the distance. The bokeh works especially well if you have strong, bright lights glowing towards them (the street lights were doing that for me).
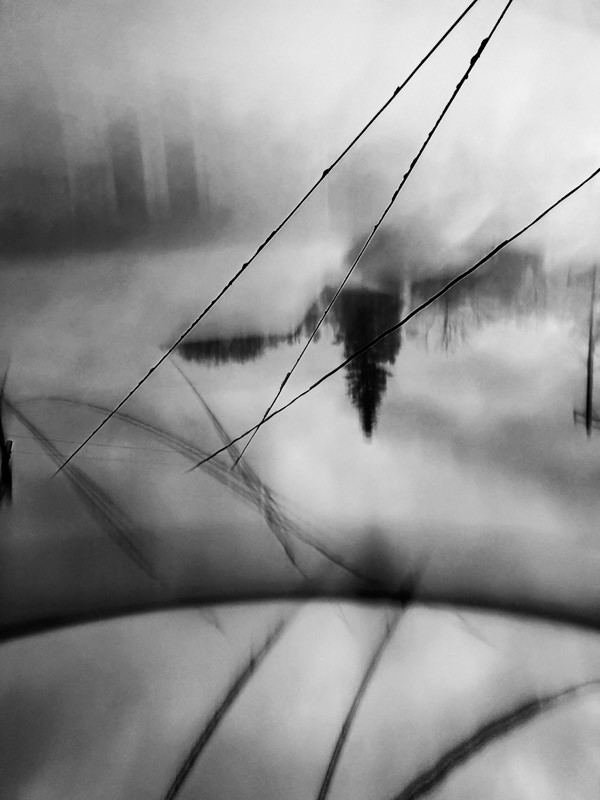
⬆ This photo was taken by placing a reflective mirror (the surface of a closed iPad) at the bottom of my frame. By placing my iPhone lens just above the surface of the flat iPad, it created a reflection of the view in front of me. In Lightroom, I then flipped the canvas 180 degrees (to make the tree upside down) and converted it to black and white.
⬆ This is a photo of a scene reflected on a brass push bar on a door. Because the push bar was slightly curved, it created a stretch effect, making the scene look like it’s moving fast.
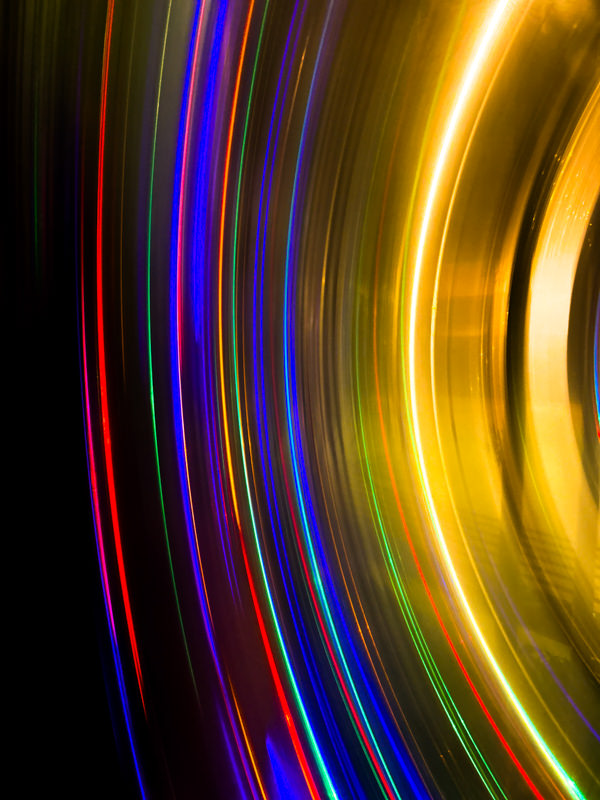
⬆ This is also a reflection on a curved, brass surface. This was the outside of a brass garbage bin, and it was reflecting Christmas lights behind me. The curve of the cylindrical garbage created multi-coloured lines, which I couldn’t resist taking a photo of!
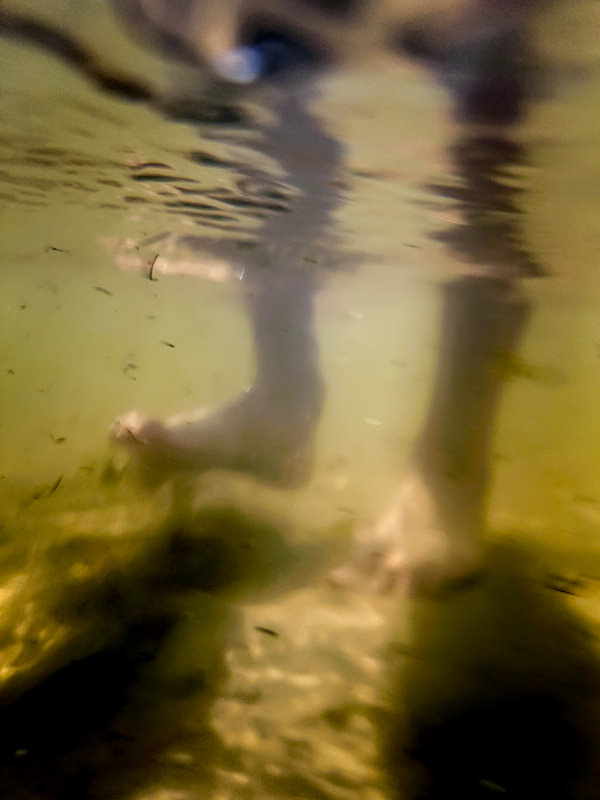
⬆ This is an underwater photo, with my iPhone in a waterproof phone pouch that came with my stand up paddle board. Since the pouch is designed primarily to protect your phone, and not primarily for underwater photography, the photo came out quite soft and blurry.
This effect could also be achieved with a proper underwater phone case, and the photo would come out a lot clearer and sharper. However, I do like how blurry and low-quality this image is. It adds mood, mystery and a dreamy, almost cinematic feel.