Adding a title, filename and alt text to your photos will boost your SEO. Here’s a workflow to follow when using Lightroom Mobile and uploading your photos to your website:
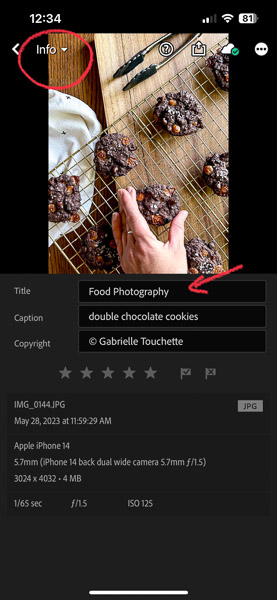
In Lightroom Mobile, go to the full view of your photo. In the top left corner, click on the drop down Edit menu and select “Info”. Next, type in a descriptive title and caption to your photo:
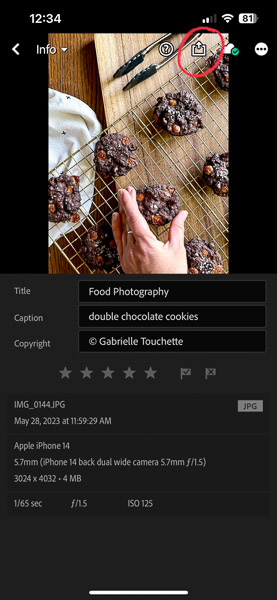
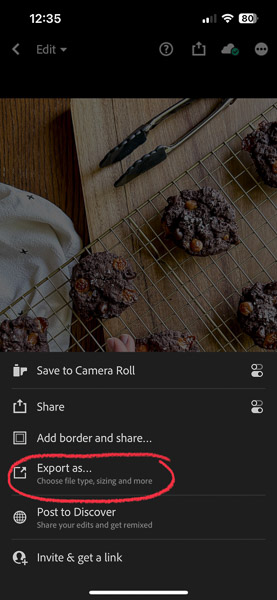
Next, click on the export icon (white box with arrow pointing up) to start prepping the photo to export as a new JPG file:
In the Export options, click on “Export as…”:
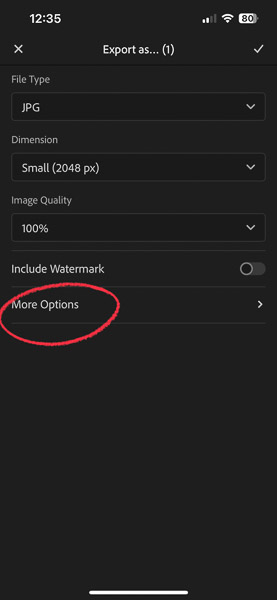
Make sure photo dimension is set to “Small”, then click on “More Options”:
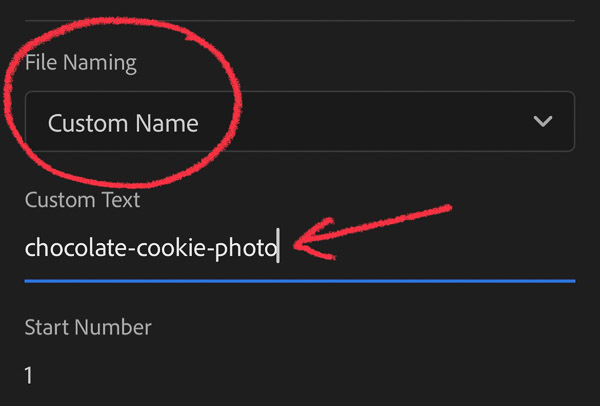
In “File Naming”, select the option “Custom Name”, then type in your custom text. Use keywords associated with your photo and separate them with a dash. This will become your photo’s filename:
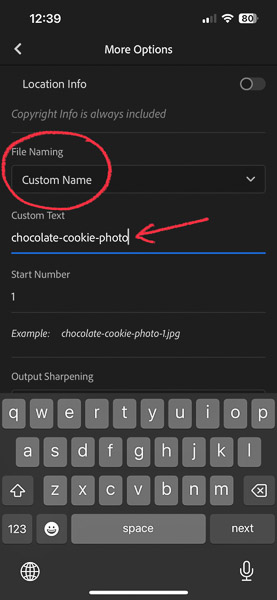
Also make sure that “Include Metadata” is checked on.
To exit out of “More Options”, click on the back arrow in the top left corner.
To finish exporting the photo, click on the white checkmark at the top right corner. The photo will render, then will ask you where you want to save the photo. I usually select “Save Image” where it’ll save the photo to my iPhone’s camera roll.
Or, if I have my MacBook nearby and ready to receive the photo, I click on AirDrop and I send it directly to my laptop.
Now that your photo is exported, the title and filename is already embedded in the file and will automatically appear when you upload it to your website.
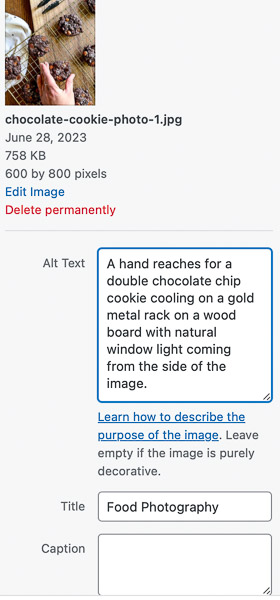
I use WordPress, and this is what my photo looks like when I upload it to my WordPress site:
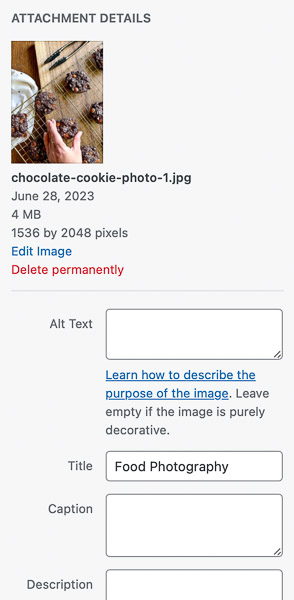
You’ll notice that the filename (chocolate-cookie-photo-1.jpg) is already included thanks to the file naming I did in Lightroom. When I upload my jpg to WordPress, WordPress will create a unique URL that links directly to this photo. The URL contains the keywords I included in the filename, further boosting my SEO.
For example, here is the URL to my photo:
https://gabrielletouchette.com/wp-content/uploads/2023/06/chocolate-cookie-photo-1.jpg
You’ll also notice that the Title field is automatically filled with the Title I gave it in Lightroom. Again, helping with SEO.
The next step (and this is a very important SEO step!) is to fill out your Alt Text field. Make sure to write a sentence with lots of keywords and that is easy to read. You want the sentence to make sense! Alt Text should describe the photo’s appearance or its function, and is primarily used for accessibility. Alt text is read out loud for the visually impaired, or can show up as text in case a photo fails to load. Alt text is also extremely effective in boosting your SEO, so don’t forget to fill it out for all your photos!
Now that you’ve added a title, filename and alt text to your photo, you’re all set for posting the photo onto your blog or website pages! Here is the finished photo, with a note on captions:

Here is the caption on my photo!
Unfortunately, I discovered that when you type in a caption in Lightroom Mobile, the caption doesn’t auto add to the photo in WordPress. I had to manually enter in a caption in WordPress in order for it to show up below the photo here. If you know how to get Lightroom Mobile captions to transfer directly to WordPress, let me know!
For more tips and photography education, follow me on Instagram or join my newsletter list here.