If you are a small business owner and you are planning to sell to your customers in your online store, you know how important it is to showcase your products on your e-commerce site in the best possible light. The problem is: you’re on a tight budget so hiring a professional product photographer just isn’t affordable right now. Instead, you’re using your own phone camera to take your photos—but they often turn out looking amateurish and don’t capture the true value of what you’re offering.
Don’t worry—you’re not alone! Many small business owners face the same struggle, but the good news is that with a few simple tips and tricks, you can start taking better product photos with the phone you already have.
Why High-Quality Product Photos Are Crucial for Your E-Commerce Business
- First Impressions Matter
When potential customers come to your online store, the first thing they’ll look for are photos of your products. Since they can’t hold or touch your products, how your photos present the quality and value is crucial. If your photos are dark, blurry or look like a quick iPhone shot, potential buyers will assume your product is also of lower quality, and they are more likely to move on to a different online store.
Shot with an iPhone 14 regular, edited in Lightroom Mobile.
- Builds Trust and Credibility
Great product photography can establish trust with your customers. When showcasing consistently clear, brightly lit and true-to-life colours in all your photos, this puts your customers at ease and makes it more comfortable for them to hand over their money to you. Having consistency and quality in all your photos is a subtle way to add big impact. —>When customers associate your brand with quality photos, they are more likely to stay loyal to you. - Sets You Apart from the Competition
In the crowded world of online retail, good product photography can give you a competitive edge. Knowing that a lot of other small business owners like you don’t have the budget to hire a professional photographer, being the one to take that extra step to upgrade your phone photography skills and improve your DIY photos will quickly set you apart above many of your competitors.
Shot on an iPhone 14 regular, edited in Lightroom Mobile
- Improves Conversion Rates
The better your product photos, the more likely customers are to click “add to cart” and complete the purchase. Research shows that products with high-quality images are far more likely to convert visitors into buyers. Even slight improvements to your photos can increase your sales.
How to Take Better Product Photos with Your Phone Camera
Now knowing the importance of quality photos, the next step is to start implementing small changes to how you use your phone camera to start taking professional-looking photos.
You don’t need to buy expensive gear, pay for camera apps or spend countless hours on YouTube to start making small changes.
Below are the 5 most important tips I teach to all my photography students. These are the same techniques I’ve been applying to my own professional commercial work over the last 16 years. (In fact, it’s some of the core stuff I learned in photography school before I started my career!)
Here are the 5 techniques and how to apply them to iPhone and Android cameras:
1. Lighting is Key
Lighting is the most important factor in a photo. In fact, the word photography literally means “drawing with light”. This comes from the Greek photo meaning light, and graph which means to draw. (also why I’m @todrawlight on Instagram!) 😉
For beginner photographers, I recommend using natural light.
This is what I do when taking product photos: I look for the brightest room and I set up my photography station as close as possible to the largest source of soft, indirect window light. This is usually found near a south-facing window.

Also, make sure you schedule your photo shoot during the brightest hours of the day. For indoor photo shoots, especially in winter months when the hours of sunlight are few, aiming for the 10am to 2pm window of time is smart.
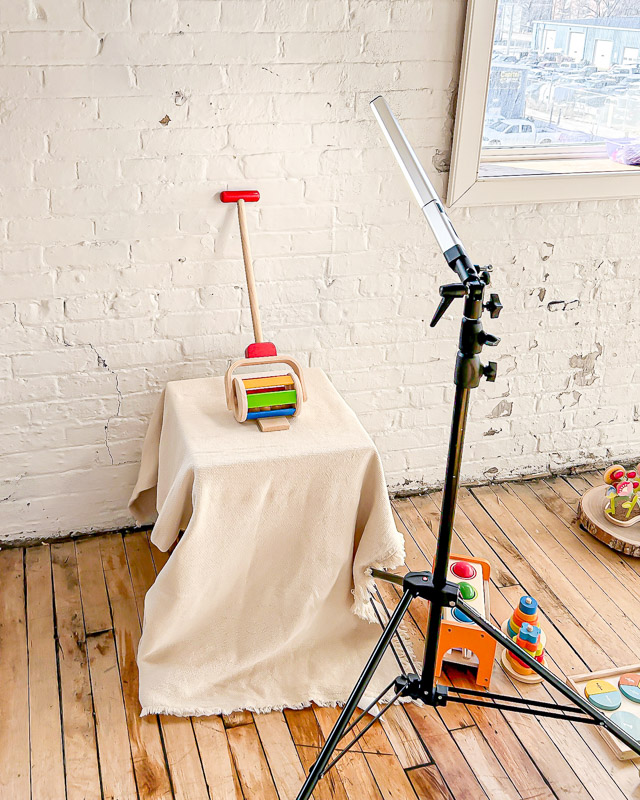
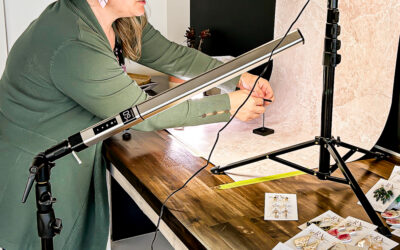
If natural light isn’t available, you can use LED lights or a ring light to brighten up your photos. I love my LED light stick (I review it here) and my LED ring light (I review it here).
2. Use a Simple Background
After lighting, the second most overlooked element in a bad photo is the background. I can’t emphasize enough how having a clean, simple background makes your product photos more successful. When the background is cluttered or too busy, it makes it hard for people to look at your photo.
If a photo is confusing to look at, the viewer will scroll to the next website. Keep your potential customers captivated and engaged. Good photographers do this by keeping product photos simple and clean.
You can buy white poster boards at the dollar store, or even use a roll of drawing paper from IKEA. Tape it to the wall and roll it down onto a table for a curved, seamless backdrop for your product.
I also love using them as a surface for my flat lay photos.
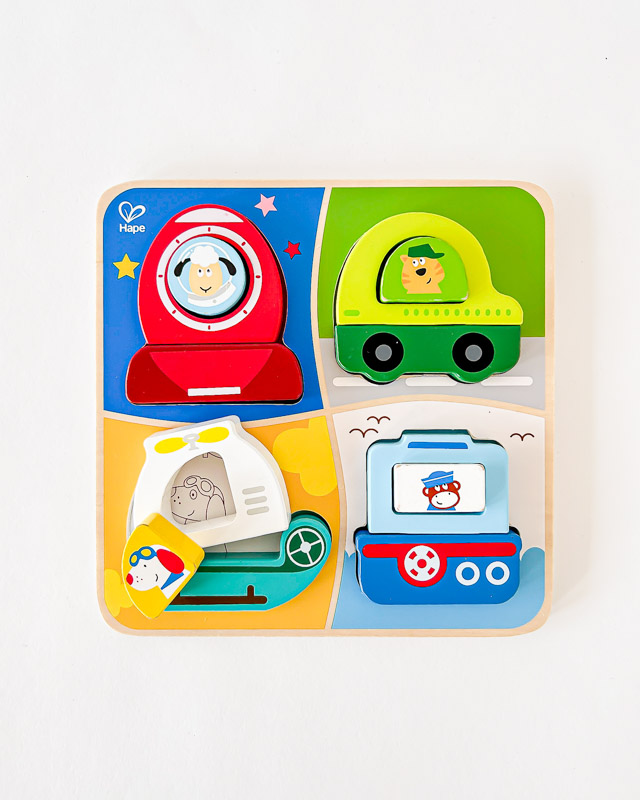
For a bit more colour and texture, using a simple wooden table placed agains a neutral white wall can make a warm and minimalist surface for your product shots.

Be creative! Almost any simple table or surface paired with a solid coloured wall can make a more captivating product shot. If your branding includes some colour, don’t feel constrained to only using a solid white background all the time. For Keiki Krate, they used a green wall for some of their shots:

iPhone photo edited in Lightroom Mobile.
The goal is to keep the background clutter-free to make sure all the attention in on the product.
3. Focus on the Details
Photos that are sharp, in focus and clear will always impress your customers more than poorly captured images. Even professional cameras when not properly focused or when underexposed, can create terrible photos.
To make sure you don’t run into any technical quality issues, here’s what you should do:
- use a phone camera that is not too old (anything after 2018 is a safe bet)
- use a tripod to avoid camera shake in low-lighting situation
- make sure the auto-focus on the camera is focusing on the right area of your image. You can manually focus if you find it helps to zone in on the right spot.
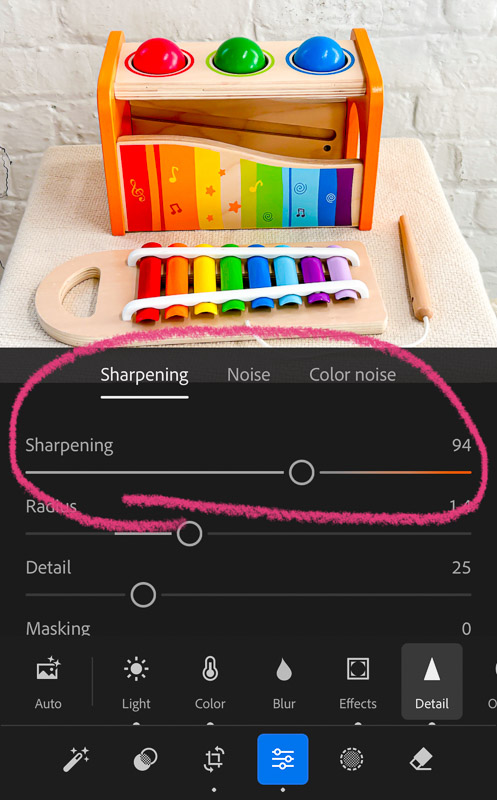
- always (always!) apply sharpening and noise reduction when you are editing your photos. I recommend using Lightroom Mobile. It’s free (yay!), and it’s specifically designed for professional mobile phone photographers (Adobe made the program – they are the #1 go-to software for professional photographers, so for me, that’s a no-brainer when choosing a photo editing app.)
4. Use the Right Angles
It’s important to show your products from different angles to give potential customers a complete view. I always make sure to shoot from the front, side, and above to capture different perspectives. I also love taking a full view of the product and also including a cropped-in view of the product.

Having variety in the photos on your e-commerce store listing helps to show off your products in a more creative way. You can also try creating lifestyle shots to show the product in action or in a different environment.
5. Edit Your Photos
Did you know? –> even the best professional photographers edit ALL their photos. There is no such thing as a photo so well photographed that it doesn’t need a bit of editing. Even if it’s just to adjust the contrast, sharpness and noise reduction, a photo will always benefit from being edited before posting it online.
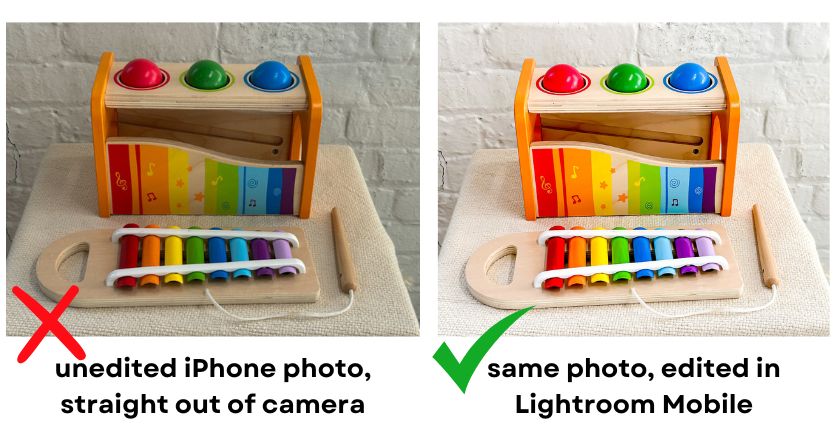
As mentioned, I always use Lightroom Mobile to edit my iPhone photos. You can create your own presets so that all your photos are consistently edited and have a cohesive look when posted online. Editing your photos makes them look polished and gives them that extra “sparkle” that a regular straight-out-of camera photo just doesn’t have.
Take Your Product Photography to the Next Level
Upgrading your photos doesn’t always mean spending lots of money on a professional photographer. Learning how to use your phone camera to its full potential while applying the foundational principals of photography (such as lighting, angles and backgrounds) is the first step to becoming a better photographer.
That said, photography is an art and a skill that grows deeper and richer the more you spend time doing it. I’m passionate about showing you how much creative potential you have and how attainable it is for small business owners to start taking their own photos.
To receive more free tips and actionable steps towards becoming a better photographer, subscribe to my newsletter here.
And when you’re ready to dive deeper, check out my online photography courses to learn how to master your phone photography.

Start taking better product photos today and watch your e-commerce sales grow!
Disclosure: I only endorse Adobe products I’ve personally used. If you purchase any products using my referral links, I may get a small commission. However, there is no extra cost to you.

