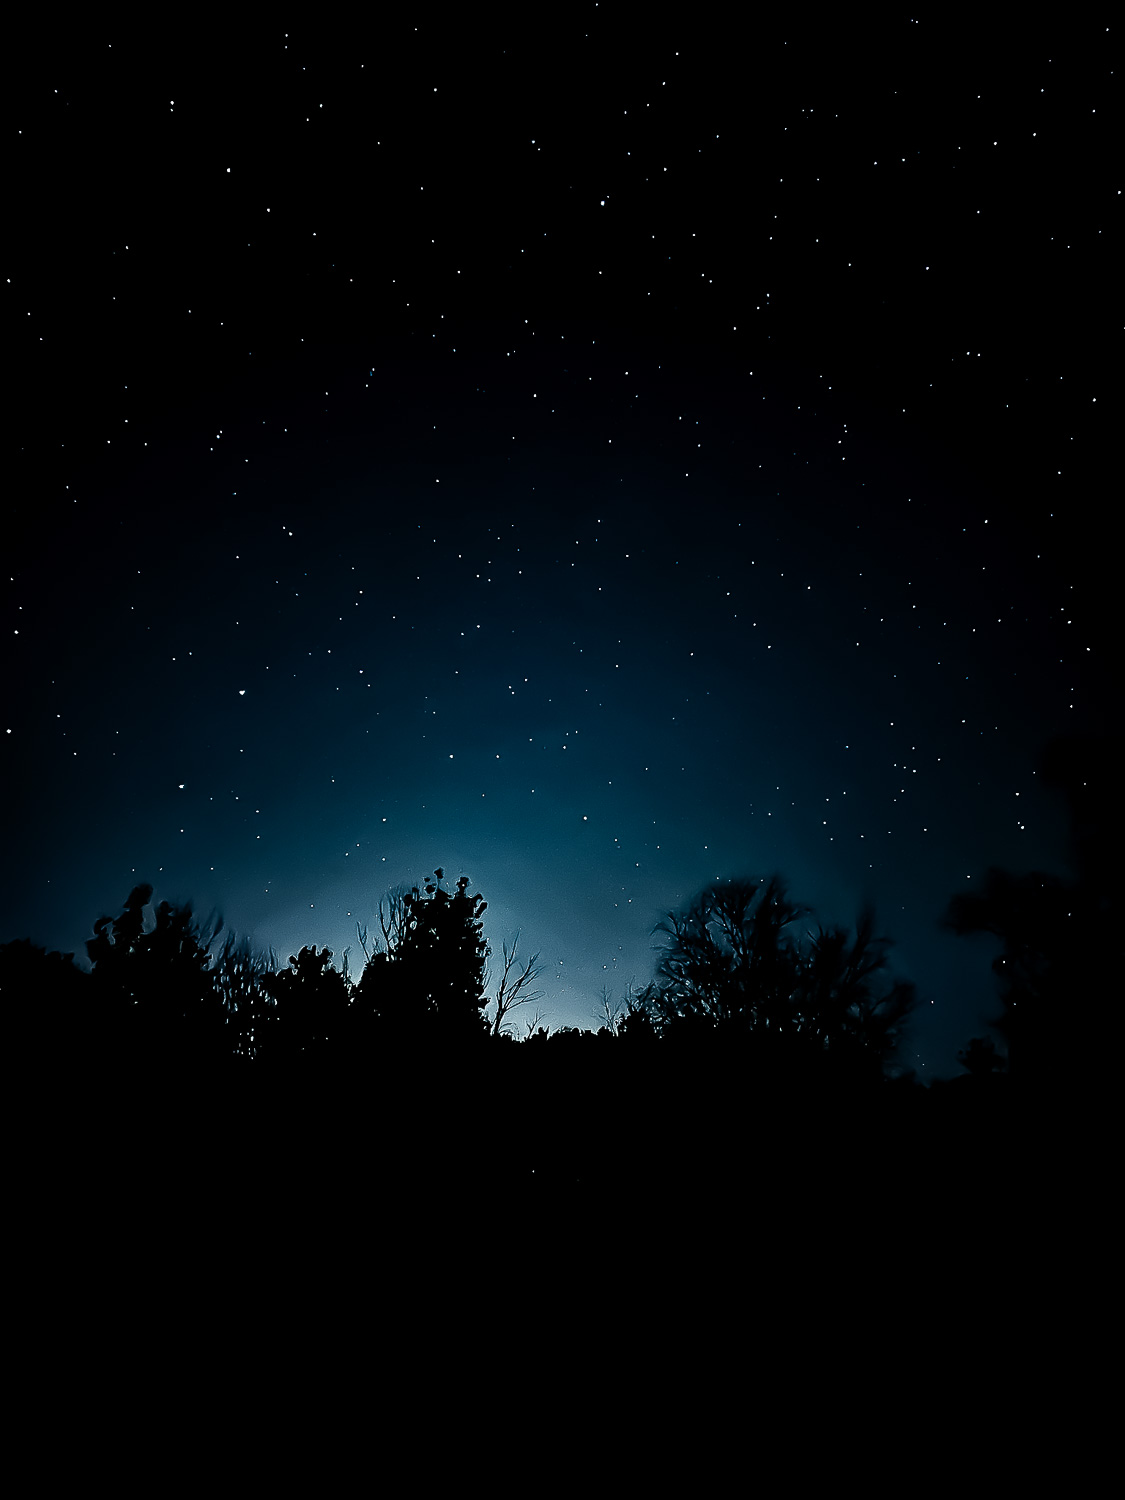
If you ever thought that taking photos of the starry night sky and the Milky Way was only reserved for professional photographers with fancy cameras and heavy duty tripods … I have good news for you.
Turns out, you can take long exposure photos with your iPhone, and the results are super fun!
Here are the steps I used to get these night sky photos with my iPhone camera:

1. Check the weather and make sure the sky is free of clouds.
2. Find an open area in a location away from city lights. I drove out to an empty field at a park 15 minutes north of the city. I waited a couple of hours after sunset to make sure the sky was dark enough.
3. Open your iPhone and max up the volume (make sure you’re not in silent or vibrate mode).
4. Open up the camera and go to Night Mode. Scroll all the way to 30s for your exposure time.
5. Go back to camera options. Scroll to the right and click on the self-timer icon. Click on 3s.
6. Place the phone flat on the ground with the rear camera pointing straight up to the night sky. Click on either one of the volume buttons to release the shutter. You now have 3 seconds to quickly walk away to avoid being in the shot! (or use a bluetooth remote to click the shutter. The one I use is listed at the end of the post.)
7. The self-timer light will flash during the 3-second delay. Once the shutter releases you will hear it open, and then you’ll hear it close 30 seconds later. If you have a hard time hearing the shutter open and close, count 30 seconds before going to retrieve your phone. If you grab or move your phone before the 30 second shutter has closed, you will ruin the photo.
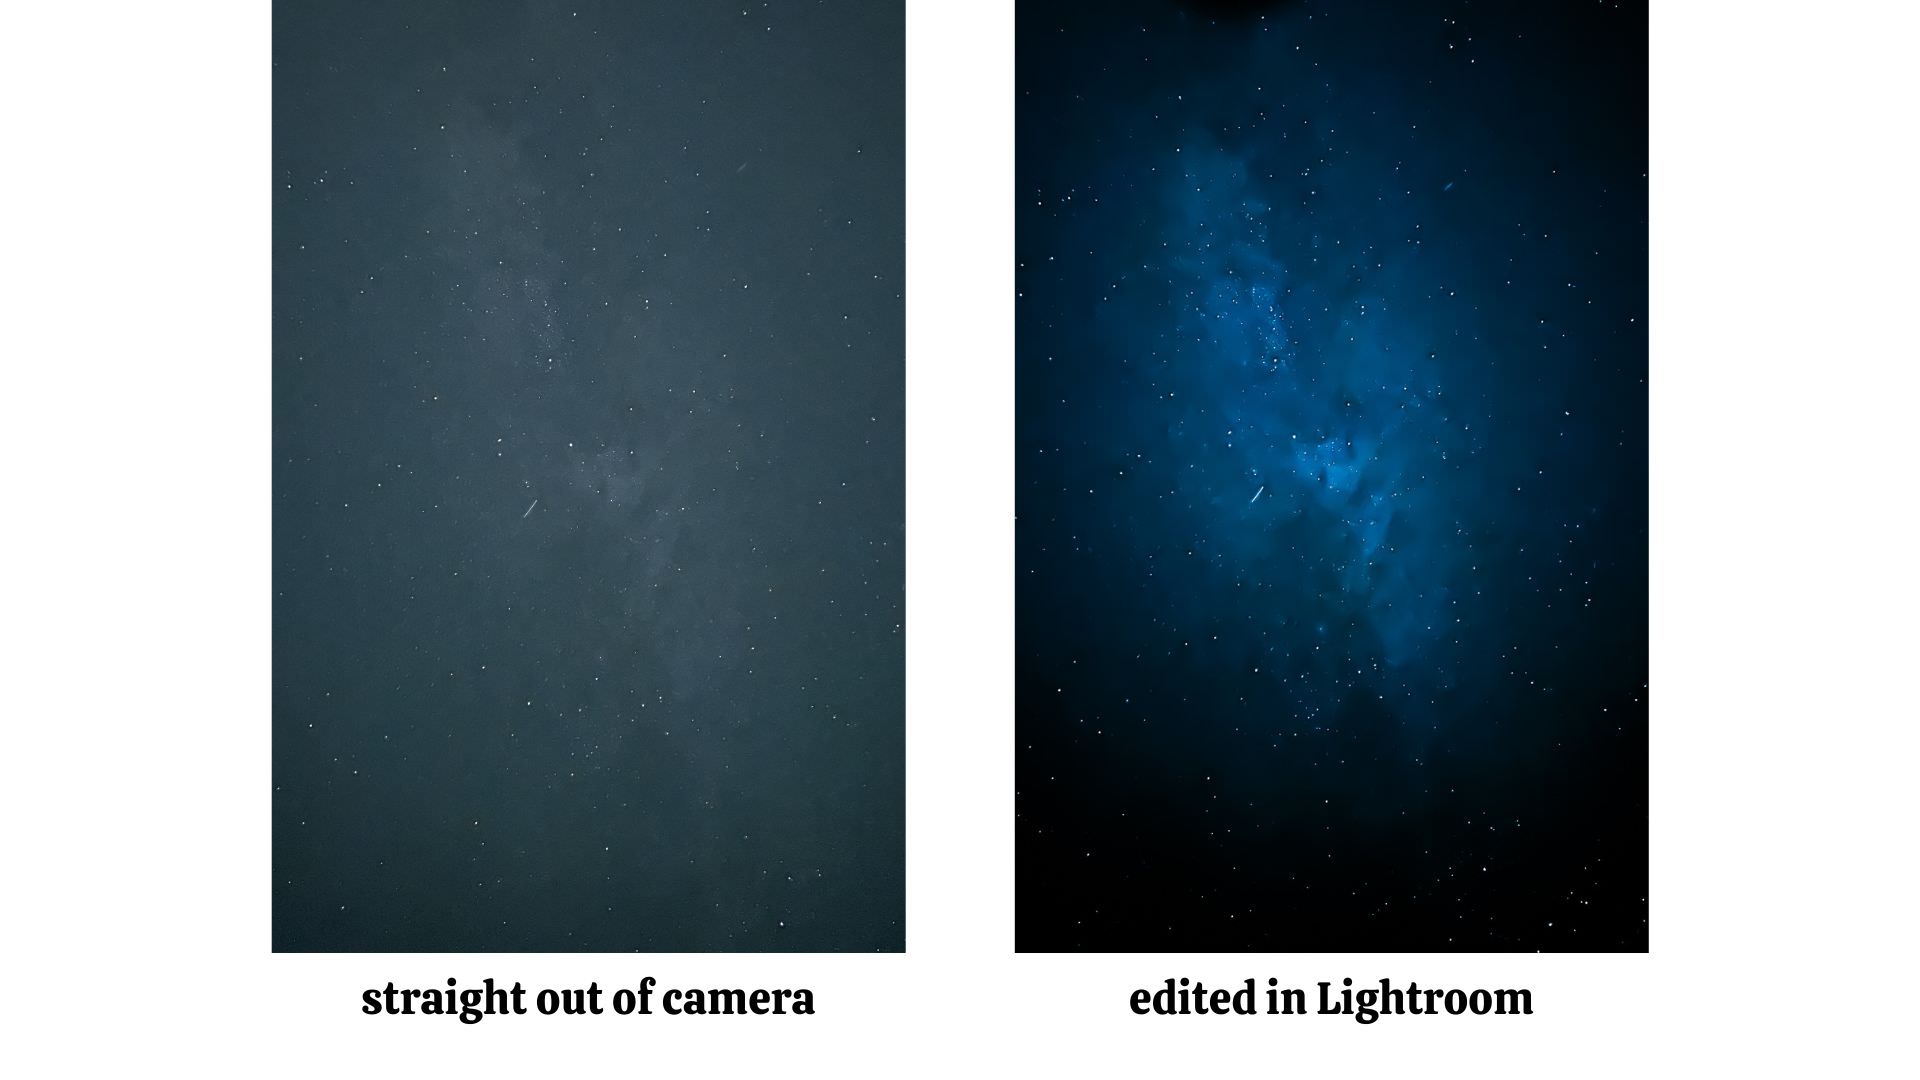
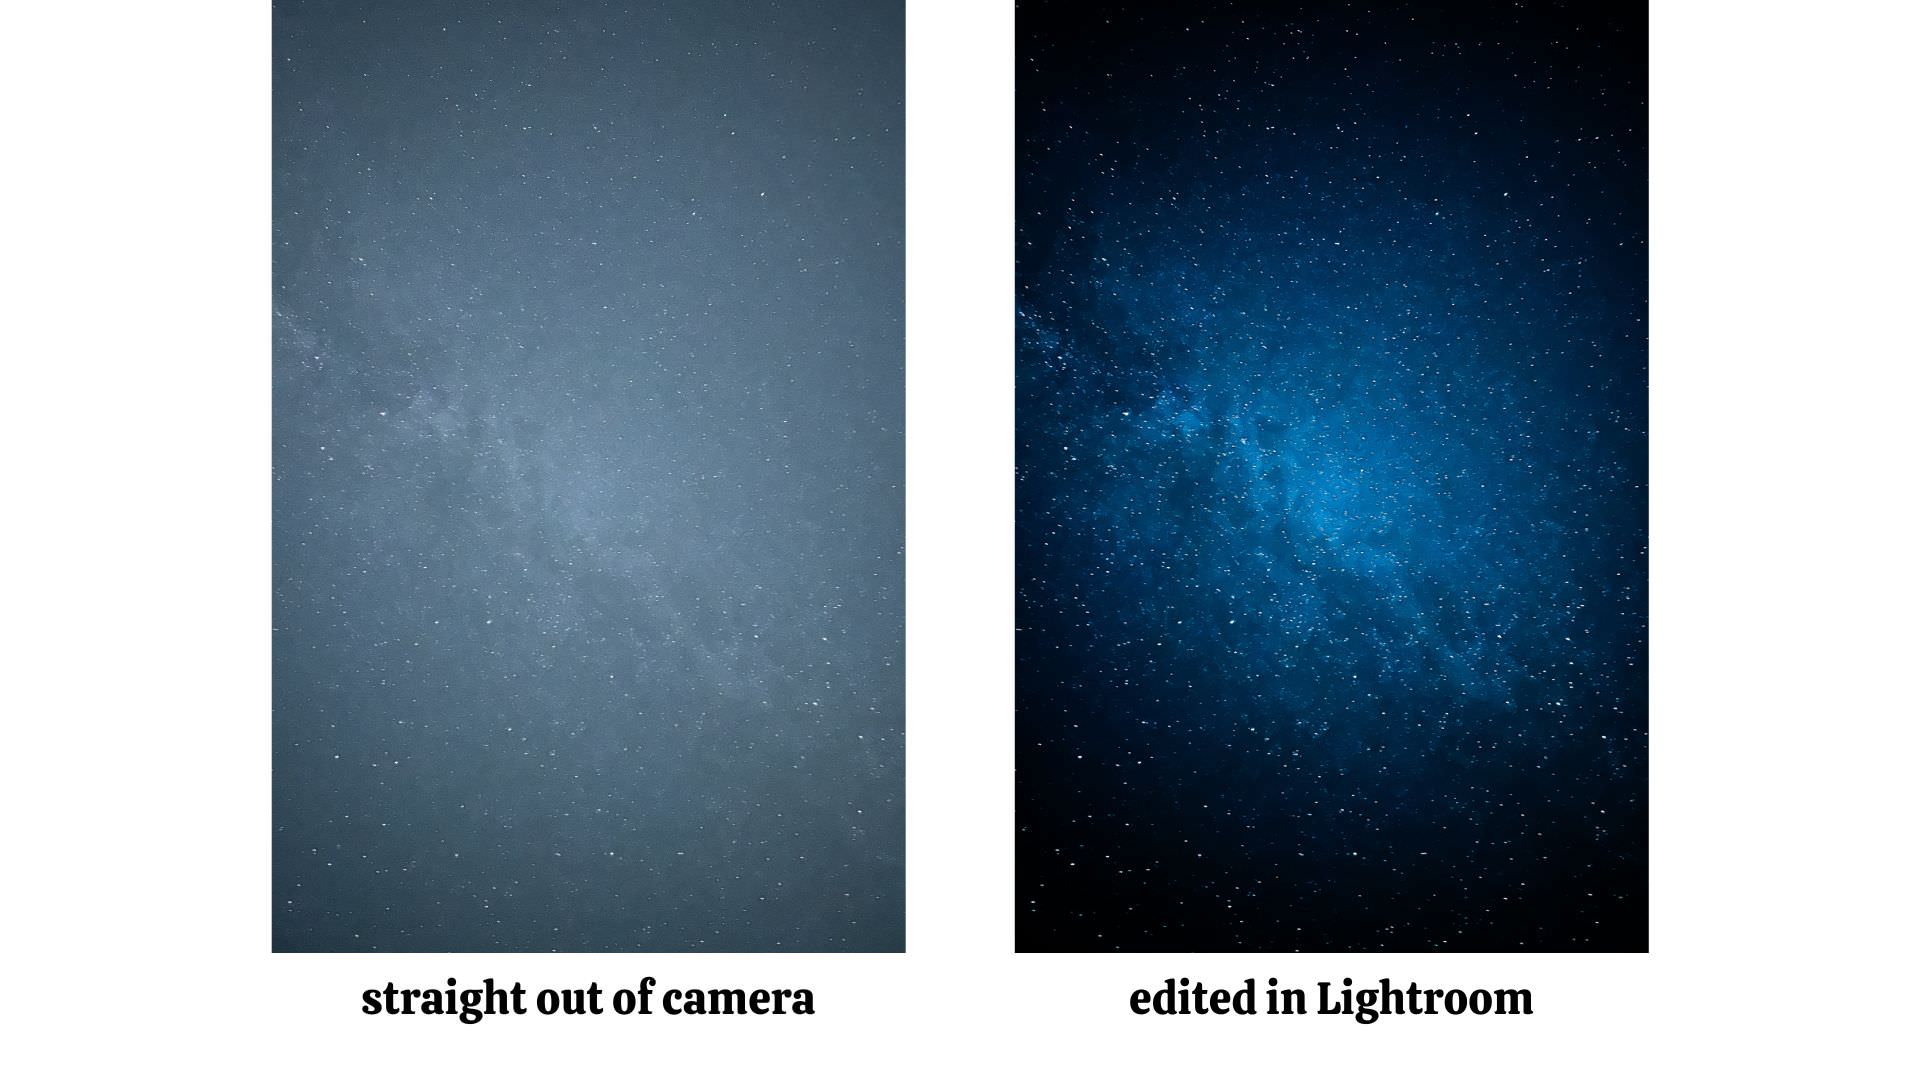
8. And that’s it! Your photo will likely look a bit dull before you edit it. It’s a good start – but make sure to edit it in Lightroom. I applied a high contrast edit to my photo to get it from looking like this, to this:
The tripod and bluetooth remote I used to take these long shutter night sky photos can be found here: iPhone Tripod with Remote
Without a tripod and by clicking on the shutter button with your hand, you will get camera shake in your photos which causes them to be blurry. It’s import to set your phone on a stable surface or on a tripod and to use the self-timer or the remote to make sure your night time iPhone photos are sharp and clear.
For a step-by-step video with more detailed instructions on how to take night time photos with your iPhone and which editing presets I used to edit them in Lightroom Mobile, visit my Patreon site here.
Have fun capturing the night sky and Milky Way on your next iPhone photography adventure! I hope these tips will help you!
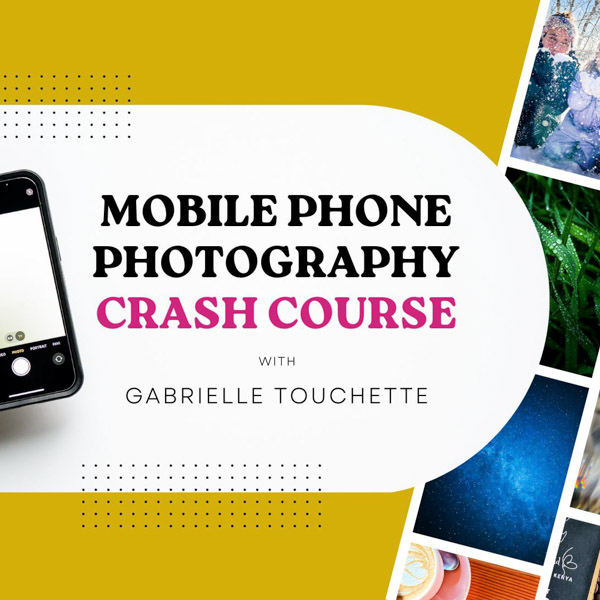
Ready to go deeper? Transform your phone photos in one hour. Watch the crash course here:

Disclosure: I only endorse photography products I’ve personally used. If you purchase any products using my referral links, I may get a small commission. However, there is no extra cost to you.